Showing posts with label Clothes for Kids. Show all posts

Wednesday, October 5, 2011

Denim Romper


I think little rompers are so cute.  I made Joselyn one using the tutorial found here.


My favorite part is the top.  I'm planning on making little dresses and tops that are similar to the top of this romper.  So simple but not plain.


I hemmed the shorts using a tutorial found here.  This was my first time doing a blind hem stitch with my sewing machine.  I think it would work even better if the tension on my machine wasn't all messed up.  (That's a whole other story.)


I like the thick elastic waist.


And the straps.  Next time I need to remember to sew the straps closer to the center so they won't fall of the shoulders.  Instead of moving them, I just criss-crossed the straps...which I like just the same.


Cute little outfit to take "Smoky" for a stroll.  (She wanted to take pictures with this horse...I gladly agreed knowing she would be happy.)


Wednesday, August 10, 2011

Sequin Shirts!

Every year in July we have to have matchy outfits for all of the cousins for the 24th of July Celebrations.  Here's a flashback just for fun.  :)


July 2007
(Had to steal this picture from my sister's blog because I can't find any of mine...still in boxes I guess.  This is Hadlee...so little and cute.)


July 2008


July 2009


July 2010
(Go here for tutorial on last years outfits.)


July 2011
(missing little Mylee)


I will say that it is gettin a lot harder to get a picture with all of the kids happy and looking in the right direction.  Cute kids though!

I got the idea from Brassy Apple.  Go here for a tutorial.

It was simple and easy.  Andy found the little jean skirts at a thrift store for SUPER cheap and they are so cute.

Here's an up close look at the design we did but you really could do just about any kind of design.


Just cause she looks so cute.  :)

Look at my girls...yep you're right...they really look nothing like me.  They do look just like my husband.  :)  Sure do love my girls though and feel so blessed to have them.


Oh, and we also tied material around flip flops for the big girls.  They looked super cute and got super dirty in all the dirt.  :)

Wednesday, July 28, 2010

Phone Booth Shirt Dress Tutorial

I know that you all have been patiently waiting for this grand tutorial so here it is. :)


A couple months ago we found these shirts at Wal Mart for $1 so we bought 5 of them for the little girls to wear to the Pioneer Days Celebration.


So here's what I did.

Take a shirt that fits and use it for the pattern.  This is a shirt for the babies (12 months).


I don't know if you can see my marks but I basically just marked wear the arm holes and the top of the shirt would be so I would have an idea wear to cut.  Don't forget to add about an inch for hems and seam allowances.  I always have a hard time making all of the sides the same when I cut so I folded the shirt in half and cut through all layers at the same time. 


Then I sewed up the sides and hemmed the arm holes.  I stitched twice along the arm holes so they would lay a little flatter.


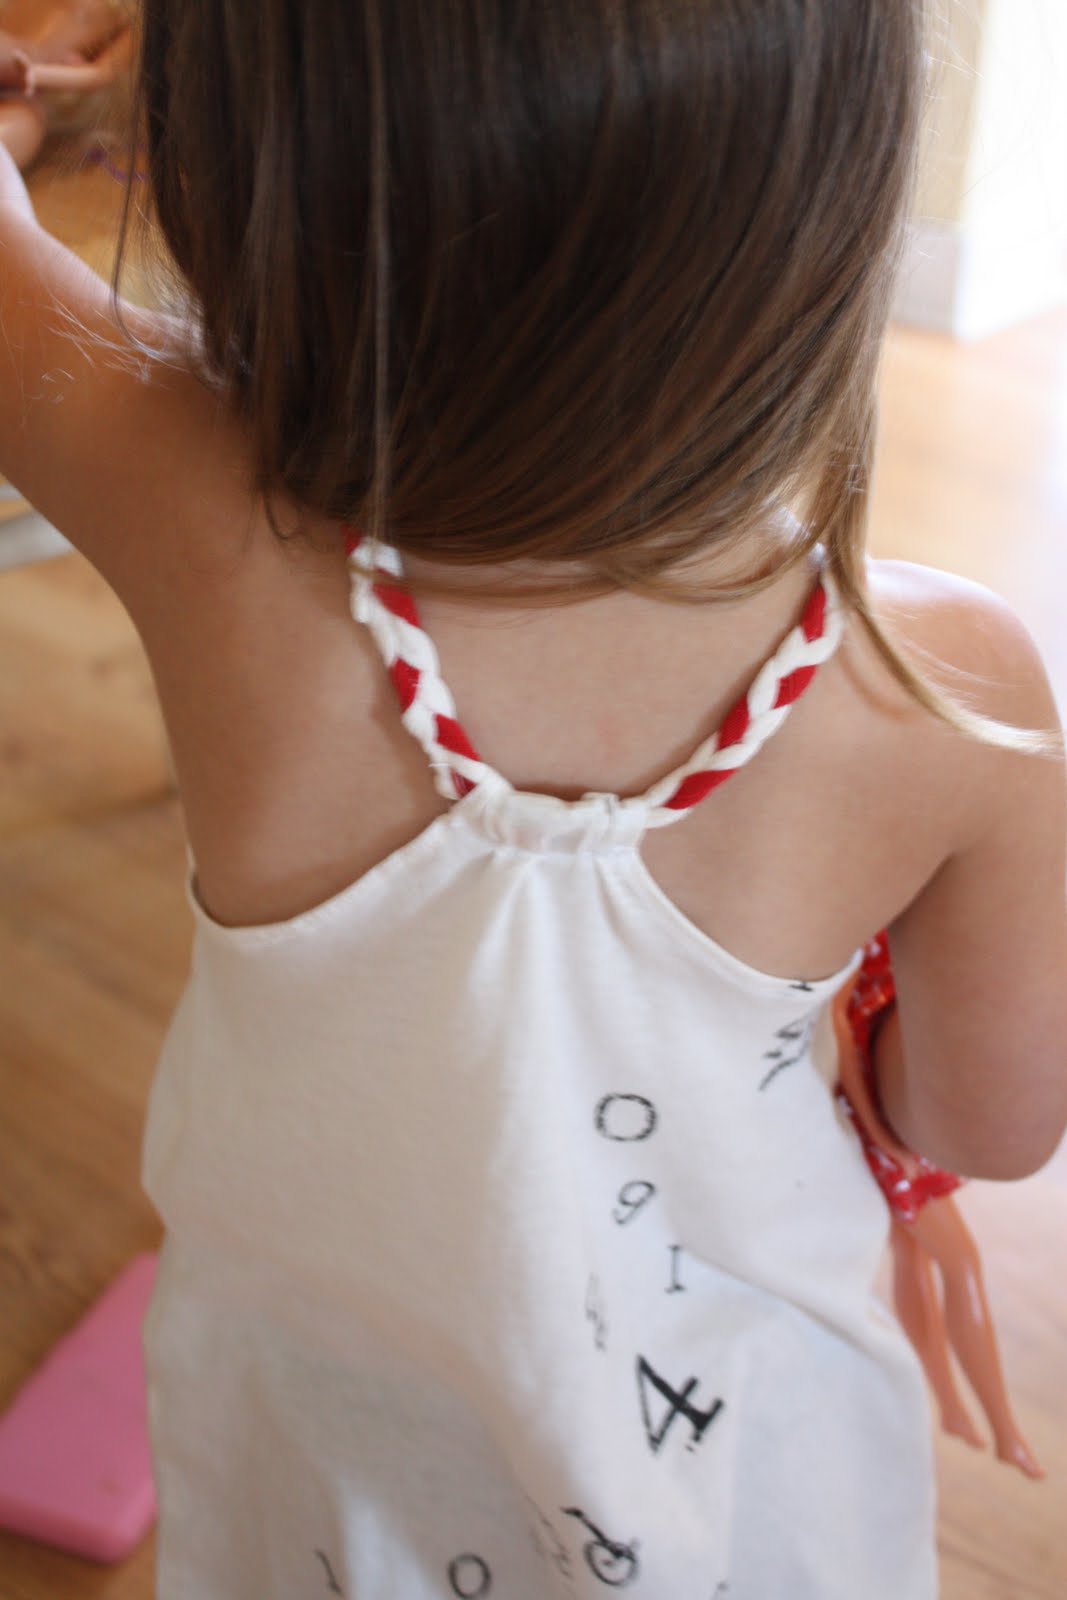
Then I cut 1" strips of material (2 strips of white, 1 strip of red from an old T-shirt that I was throwing away).  Braid the strips together and using your original shirt measure how long you'll need the straps.  Sew the two ends of the braided strap together.  Fold the back of the shirt over your strap and stich along the bottom.  I gathered the back just a bit but you wouldn't have to.


Now all you have to do is hem the bottom where you want it and you're done.  Super easy and fast.

And if you try the finished project on your little model and find that the straps are too long you could just fold it up in the back like I had to with Joselyn's.  (Can you tell from this picture?)
(Cute little buns huh?)


It was super hot outside so it was nice to have a thin shirt that wasn't too hot.  They even worked great while playing in the park.


Oh and we also braided some red and white straps for flip flops.


Of course we had to finish the look off with lip gloss.  Let's be real, this girl doesn't leave the house without having lip gloss with her.  Crazy child.


They were even good outfits to take a little nap in.

I thought the girls looked super cute and it was a lot faster than some of the previous years outfits so that was nice.


If you have any questions, feel free to leave a comment or email me at rufflesandmudpuddles@hotmail.com.


Happy Wednesday!

Thursday, July 15, 2010

Sneek Peak

Here's a sneek peak of what I'm working on.  Watch for a tutorial and lots of pictures coming soon.  The tutorial will include how to make this ranging from sizes 12 month to 8.  :)


Now back to cleaning I go.  :) 
Getting ready for the big move is not so fun at this point.  I hate going through all of my junk.  I'm such a pack rat.

Wednesday, May 26, 2010

Little Mermaid Shirt

So I have lots of bags of clothes that really should be donated to goodwill.  Let's just say that I'm a bit of a pack rat and I can't throw anything away.  I'm determined to make as many things as I can using random stuff I have laying around the house. 

Yesterday I made Joselyn this:


From this old T-Shirt of mine (that I can't really say that I ever wore.):

Ruffles and Stuff just posted a tutorial for it yesterday.  Go here for the scoop.

It was pretty simple and fast to put together.  It was pretty baggy on Joselyn so I shirred around the middle to make it a little smaller.  When I first made it I thought it looked like the dress that Arial wore when she first got her "legs"...you know the dress that was made from a sail?  (Very frumpy!)  But it ended up looked pretty cute on.


I braided some straps and criss crossed them in the back.


It's frilly but fun.  (Obviously it's fun to stick your bum out and make silly faces too!)


It's super fun to run from your mom while she's trying to take your picture.


You could make it longer and have a super cute summer dress.  If I didn't think that I would look like a whale in it, I would make one for me too. :)

 
Happy Wednesday!